Introduction
My quadcopter was supposed to take first flight this weekend but since it is now a 'minion battle royale', I thought I would kick it up a notch. Batman was abducted from my workbench and now Pikachu is sitting there alone. I thought Minion Dave would make an excellent addition and hence I am doing this post today instead of tomorrow morning in the hopes that I get a friend for poor pikachu.
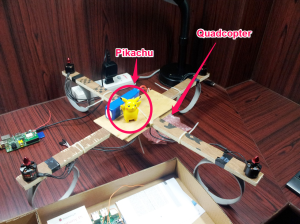
I received the Scope and the extra RPi B+ AND an additional EnOcean Kit AND the EOP 350 AND a TCM330. Additionally, I also received all the parts I had ordered using my budget. My order consisted mainly of Op-Amps- one or two of every one I could think of and an FTDI chip and some other misc stuff. Needless to say I would have replaced the EnOCean Sensor Kit I ordered and would have bought the TCM330U but its all good.
I will possibly post an VIDEO Eagle tutorial next week but right now I am bent on finishing the hardware part ASAP. My previous post was a complete description of my project and I am sticking with it. One important part was to use an enocean module to transport sensor data instead of using something like an Arduino(which I am also going to do but via ethernet).
One of my objectives for this challenge is to demonstrate how the EnOcean modules are IOT enablers and how easy it is to use them in your own application. This post I will be documenting the process to getting the proverbial "Hello world" of the electronics world- the blinking LED to work on the EOP350. I was going to do a video but it seems they are not too watched. If you guys want me to post videos I can do that was well but I need feedback for that. So without further ado, lets go!
The EnOcean TCM320 Anatomy
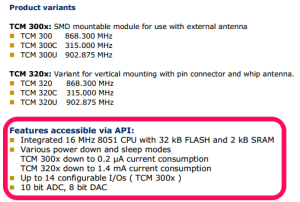
It is important to understand what makes the enocean modules tick. At the heart is an 8051 uC which has quite a simple architecture. I teach a course on it and I have used it in Industry products successfully. The 8051 core is modified to work with low voltages and to have a deep sleep mode which allows it to consume almost no power. TI's MSP430 is usually where I go to get ULP uC but this seems to get the job done as well. The datasheet is available at the EnOcean web site and will prolly update with time. The interesting bit is this part below.
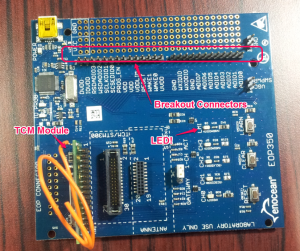
This means I can use the ADC to read a value and transmit it to no less than the EnOcean PI and to OpenHAB. EnOcean makes this quite easy by not only giving us the EOP350 but the API and Dolphin Studio and Dolphin View for download at their website. I am going to try and get the LED to blink first and then work up to the Sensing. The EOP350 can be used to do experiments since it has a general purpose area as well as the PINs from the modules brought out! Fantastic! Here is the break up.
The next step is to find out where the LEDs on the EOP 350 connect. For that the datasheet is available at the website as well. The schematic part is what I am interested in.
Datasheet Exploration
So I downloaded the datasheet from the EnOcean WebSite and...
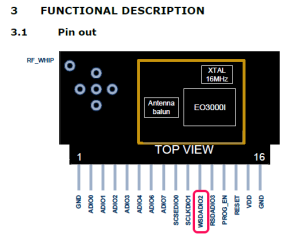
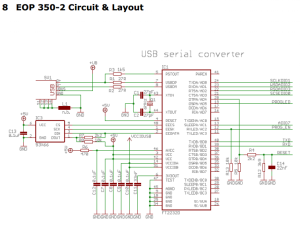
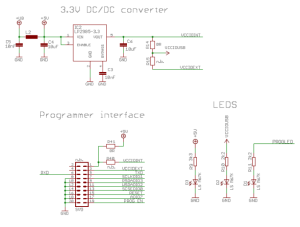
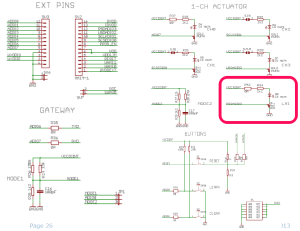
Now this means that the WSDADIO2 is connected to LMI LED and I can try and program it to blink. This is enough information and now we can start with the software.
The Software Setup
I installed the Dolphin Studio as well as Dolphin View AND I borrowed a license for the Keil 8051 Compiler. We need to do things step by step:
1. Install Dolphin Studio as well as Dolphin View(not needed but useful)
2. Install Keil IDE for 8051 and license.
3. Install the EnOcean API for modules.(EO3000I_API) During Setup it will configure Keil as well.
We need to connect the Dolphin Studio which will be used to generate configuration code with the Keil COmpiler which will be used to compile the firmware. In the install directory for the Dolphin API, there is an examples folder which as some ready code with uvision projects.
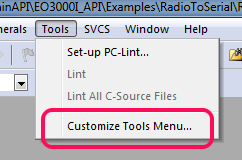
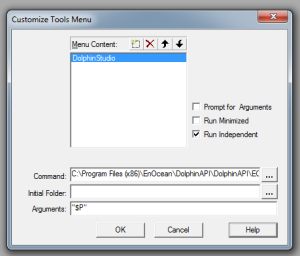
You need to create a new menu by...
Creating a Project
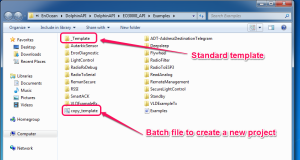
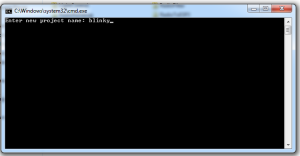
Creating a project is very simple. In the Examples folder where you installed the API, there is a file called Copy_Template. Execute it and you can create a new demo project.
IMPORTANT: I usually install this stuff in a drive other than C: since windows UAC will cause problems. I recommend this for win7 and above. Also run the Copy_template.cmd as administrator.
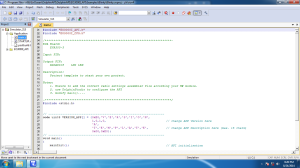
Now open the Keil project. This is what you should get...
Now I did not choose the LMI LED randomly. The template already has code to toggle the LED.
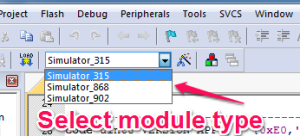
Fantastic! Next Select the Correct module type. This makes the decision for which files are to be included and which included in the build process.
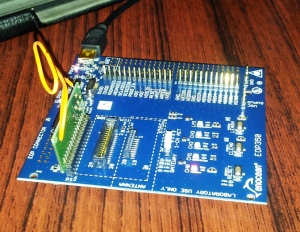
The last step is to connect the EOP350 and the TCM module.
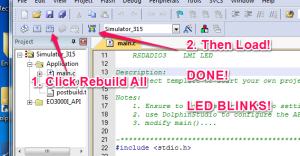
First Click Rebuild all and then the Load button. It will invoke the EOP350 programmer automatically! Fantastic. Now you have a blinking LED.
Done!
Conclusion
It is actually that easy. This is just the beginning and I think this is the reason why enocean gave us these wonderful kits. I was going to build one if I had not received one. The next step is to use the API telegram sending capabilities and I will share that as well in my upcoming posts. I plan to add a small circuit which converts weight into voltage and this module to send that weight to OpenHAB. I think I can safely say after this demo that it is very easy to customize the EnOcean Modules as well as use it in our own design. I was going to use XBEEs but I think I can omit them this time around in my project.
EnOcean if you are listening, I want to say,"This stuff is brilliant!". I will also try and customize the temperature sensor module in the hopes that I can use it to transmit small digital signals in addition to the temperature.
I am waiting for the RPiSOC final list to come out so that I may decide the last part of the build. I am putting overtime this time around and I hope I get things right this time in the challenge.
Please leave a comment if you would like to correct something OR if you would like to see me do videos for this stuff.
Thanks,
IP

No comments:
Post a Comment