I went through some old stuff I had in boxes and I dug up two things that I thought were very useful.
- An Old Bluetooth Headset.
- A Nintendo Wiimote.
The Bluetooth headset was in pretty bad shape and I thought it only fair to put it out of its misery.
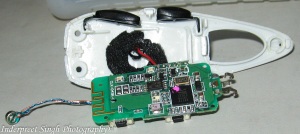
So I cut it open and I found something I recognized- a silkscreen with very useful test-point information. The complete SPI Bus was put on test-points and I will try to control the BT device with a microcontroller like AVR or PIC with in-built SPI controllers. Anyone has any input gimme some pointers.
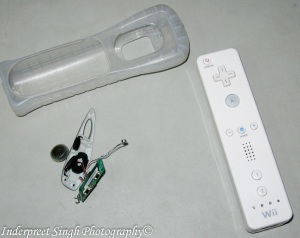
The second Item, the wiimote I am more familiar with in terms of hacked open. I am gonna share some work on the wiimote and a software called glovePie 0.43. in this post.
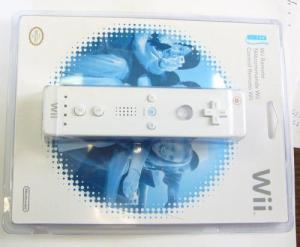
The wiimote is a game controller made and sold by Nintendo. A main feature of the Wii Remote is its motion sensing capability, which allows the user to interact with and manipulate items on screen via gesture recognition and pointing through the use of accelerometer and optical sensor technology. Another feature is its expandability through the use of attachments. The attachment bundled with the Wii console is the Nunchuk, which complements the Wii Remote by providing functions similar to those in gamepad controllers. Some other attachments include the Wii Classic Controller, Wii Zapper, and the Wii Wheel.
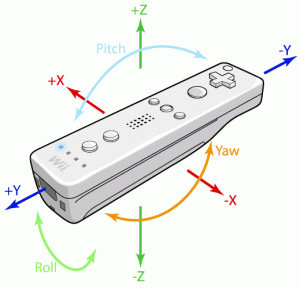
The Wii Remote has the ability to sense acceleration along three axes through the use of an ADXL330 accelerometer. The details are available at http://www.analog.com/en/sensors/inertial-sensors/adxl330/products/product.html. Analog has deemed this IC outdated and an newer ADXL335 is now available.
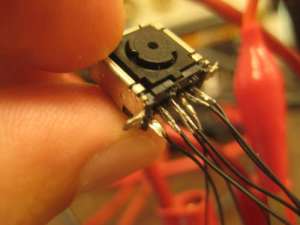
The Wii Remote also features a PixArt optical sensor, allowing it to determine where the Wii Remote is pointing. Unlike a light gun that senses light from a television screen, the Wii Remote senses light from the console's Sensor Bar which allows consistent usage regardless of a television's type or size. The Sensor Bar is about 20 cm (8 in) long and features ten infrared LEDs, five at each end of the bar.
The Wiimote communicates with its master over Bluetooth and If you want to connect it to a PC – you can! Bluesoile software suite of drivers seem to work the best. For that reason I dug out my old BT dongles and Driver CDs. There are a lot of people out there with tutorials for the same but I don’t think its needed. Simply press the 1 and 2 button on the wiimote and use the PC to find the device. Pairing is without passcode and painless. The master stroke was using the 8051 microcontroller core at the heart of it all. The Controller probably pings the EEPROM for the code.
Our friends at sparkfun.com http://www.sparkfun.com/tutorials/43 have already confirmed that theory. So the hardware summary is Bluetooth + Accelerometer + PC Software = lots of fun.
One of the better written articles was http://www.stephenhobley.com/blog/laser-harp-2009/chapter-five-wiimote-tracking-hardware-solution/ which was all about the extraction and using of the pixart sensor with an AVR. A similar article was written by Jonny Lee at http://procrastineering.blogspot.com/2008/09/working-with-pixart-camera-directly.html Jonny lee is well know for his work with the wiimote and related projects.
The GlovePie Software is able to talk to the wiimote and can be used to turn the wiimote into a HID device. I did a little experimentation and found that the accelerometer output is very sensitive. The software provides “Class objects” for each parameter like for the acceleration at x axis is obtained using = wiimote.gx and for y axis using =wiimote.gy and so on. I thought it’s a really simple thing to play with like wiring and python etc. I wrote a little script to control the mouse pointer with the wiimote. Since the accelerometer output was very sensitive to vibrations I did not concatenate any value in the decimal place by rounding off. Instead I went ahead and implemented a simple FIR filter with each coefficient of the same value of 1/d where d is the depth of the filter... In layman;s terms I made a buffer and used the average value of the window. The results were quite nice too.
The code is given below and let me know if someone wants to add something.
// Using Pitch and Roll to manipulate Mouse Pointer
// By Inderpreet Singh
// Acceleration Variables
// Not Useful here but good for the demo
var.xRot = Wiimote.gx
var.yRot = wiimote.gy
var.zRot = wiimote.gz
// Yaw can only be sensed using the Wiimote Plus addon
var.yaw = wiimote.Yaw
var.roll1 = var.roll2
var.roll2 = var.roll3
var.roll3 = var.roll4
var.roll4 = var.roll5
var.roll5 = var.roll6
var.roll6 = var.roll7
var.roll7 = var.roll8
var.roll8 = var.roll9
var.roll9 = var.roll10
var.roll10 = wiimote.Roll
// Roll varies from +90 To -90
var.pitch1 = var.pitch2
var.pitch2 = var.pitch3
var.pitch3 = var.pitch4
var.pitch4 = var.pitch5
var.pitch5 = var.pitch6
var.pitch6 = var.pitch7
var.pitch7 = var.pitch8
var.pitch8 = var.pitch9
var.pitch9 = var.pitch10
var.pitch10= wiimote.Pitch
// Pitch Value varies from +90 To -90
var.rollavg = (var.roll1 + var.roll2 + var.roll3 + var.roll4 + var.roll5 +var.roll6 +var.roll7 +var.roll8 +var.roll9 +var.roll10)/10
var.pitchavg = (var.pitch1 +var.pitch2 +var.pitch3 +var.pitch4+ var.pitch5 + var.pitch6 + var.pitch7 + var.pitch8 + var.pitch9 + var.pitch10)/10
// Mouse cursor on the screen can vary from 0,0 - Upper Left Corner to 1,1 bottom right corner.
// The Two values need to be mapped to each other.
Mouse.x = MapRange(var.rollavg, -40 degrees,40 degrees, 0,1)
Mouse.y = MapRange(var.pitchavg, -40 degrees,40 degrees, 0,1)
wait 100ms
Mouse.LeftButton =wiimote.B

No comments:
Post a Comment