 PI and BTsync[/caption]
We have already discussed my version of setting up a RPi. Now its times to do something useful with it. In this tutorial, we will be using the RPi as a cloud server for backing up files from anywhere securely.
I am running a headless server hence I will be logging into my RPi using SSH. For most exercises we don't need a display attached to the RPi itself. So lets get started.
First things first
The first things to do before installing anything new is to update everything that is currently installed. To do this simply type;
[code language="bash"]
sudo apt-get update
sudo apt-get upgrade
[/code]
This will download updates if any.
Get BtSync
The next thing to do is to download the ARM build of the Bit Torrent Sync software. Even though its not open source, it can work for our task. At the terminal type
[code language="bash"]
mkdir ~/.btsync && cd ~/.btsync
wget "http://btsync.s3-website-us-east-1.amazonaws.com/btsync_arm.tar.gz"
tar -xvf btsync_arm.tar.gz
./btsync
[/code]
At this point you should get something like
BitTorrent Sync forked to background. pid = 3143
which tell us that it ran successfully.
Space in my cloud
Now we need to select where we can save the files that are synced. I am using a 16Gb SDcard and will be using that memory itself for my work. However, you can also use an external drive or a USB thumb drive. In order to use the thumb drive we need to do the following.
Plug the thumb drive in to the Raspberry Pi. Open up terminal and type in:
[code language="bash"] df -h [/code]
You will probably find your thumbdrive is something like /dev/sda1 or /dev/sda2 in the next steps replace /dev/sda1 with what you got in the response. (A word of WARNING: the followng steps will erase everything on the drive and label it as BtSync.
[code language="bash"]
sudo umount /dev/sda1
sudo mkfs.ext4 /dev/sda1 -L BtSync
[/code]
Setup BtSync
For this step you need to know the IP address of your RPi. I set it up to be static so it is always 192.168.1.101. Please replace this string with what every your RPi is at(its the IP address you used to SSH to it.)
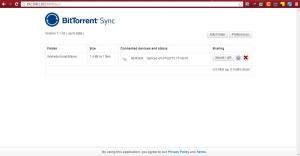
Using your favorite browser, navigate to "http://192.168.1.101:8888/gui"
[caption id="attachment_676" align="aligncenter" width="300"]
 btSync in browser[/caption]
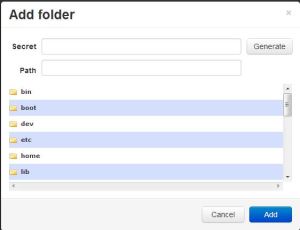
Select ADD FOLDER:
[caption id="attachment_708" align="aligncenter" width="300"]
 btSync_addfolder[/caption]
This will bring up a popup where you need to tell BTsync the location of the local folder. If you are using the thumb drive then just point there. Else if you are setting it up as I did then create a directory and select it. Click on Generate SECRET and copy that string for future reference. This will allow you to connect more devices to the cloud. In case you already have been using Btsync, you can copy the SECRET to sync those folders to the PI.
Setting Startups
You typically want that the BTSync should start everytime your RPi boots. In order to do that you need to create a BASH Script and register it with update-rc.d This is how to do exactly that. At the terminal type:
[code language="bash"]
sudo touch /etc/init.d/btsync
sudo nano /etc/init.d/btsync
#! /bin/sh
# /etc/init.d/btsync
#
# Carry out specific functions when asked to by the system
case "$1" in
start)
/home/pi/.btsync/btsync
;;
stop)
killall btsync
;;
*)
echo "Usage: /etc/init.d/btsync {start|stop}"
exit 1
;;
esac
exit 0
[/code]
Do a Ctrl+X to exit and then change permissions using:
[code language="bash"]
sudo chmod 755 /etc/init.d/btsync
sudo /etc/init.d/btsync start # test that the script starts
sudo /etc/init.d/btsync stop # test that the script stops
sudo update-rc.d btsync defaults
[/code]
Thats it! Hope this help and please feel free to leave a comment.
No comments:
Post a Comment