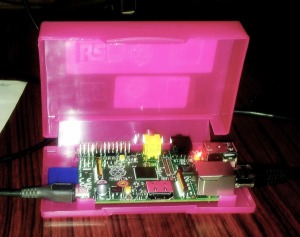
 Raspberry PI Standalone[/caption]
About a month back, I finally got around to ordering my first raspberry pi and it was delivered soon after. For the next few days it stayed on my workbench partly because of my busy schedule and partly because I could not find an updated getting started guide. So when I finally got started I decided I would write a getting started guide myself and that's what brings us here. This post is what I did to get started and I am not claiming this to be in anyway the best method. It's just what I did. So here we go.
What is needed?
Well obviously the first thing that you need is a Raspberry Pi. The next thing is a SDCARD. I am using a 16gb one. In order to load an os onto the card we need a card reader. The other thing we need is a PC with either windows or linux and a software for writing disk images(read on).
Step 1.
The first thing to do is to Download the OS to be installed. There are a couple of options and I won't go into the details but I went with the most popular choice which is Raspbian - a debian based linux distribution. It is available for download here
Now we cannot simply copy this file to the memory card. For writing this disk image to the SDCARD we use a software like imagewriter for linux and win32diskimager for windows. Insert the SDCARD into the card reader attached to your PC and start the software. Next point the software to the image file and destination as the SDCARD and click write. It will take a few minutes and will give you a message once done.
Now you have a ready memory card.
Step 2.
The next step is plugging the memory card into the rpi and connecting the power. We also need to add a display and at least a keyboard. In my case I was interested in setting up a headless system hence I did not need to start the GUI and corresponding did not need a mouse. When you hook up everything and power it up for the first time, a configuration script is executed (this script can also be executed manually by typing "sudo raspi-config" at the command prompt without the quotes.)
First thing to do is to expand_rootfs the file system to the entire SDCARD. Second thing is to enable SSH so that we can login remotely. And third is to set the local timezone.
For me that's about it. I selected finish and went onto the prompt. By default the username is pi and password is raspberry. In configuring the Pi I wanted to setup a static IP so that I know where I want to SSH to.
To do this, at the prompt type the following
[code]
sudo nano /etc/network/interfaces
[/code]
And replace the iface eth0 inet dynamic with
[code]
iface eth0 inet static
address xxx.xxx.xxx.xxx(enter your ip here)
netmask xxx.xxx.xxx.xxx
gateway xxx.xxx.xxx.xxx(enter gateway ip here)
[/code]
And then reboot.
Step 3.
Now that the Pi has a static IP and SSH we can do without the display. The Raspberry Pi just needs to be connected to the network and supplied power. We can now use ssh to login to your Raspberry Pi. For Linux users it's as simple as typing ssh xxx.xxx.xxx.xxx and for windows users free software like putty can be used.
Once logged in remotely, I did the following
1. Update the OS by typing sudo apt-get update & sudo apt-get upgrade
This will download all updates for installed apps.
2. I went on to install a VNC server incase I need a GUI by typing sudo apt-get install tightvnc
For normal usage I finish here and proceed with installing the apps I need. If however you are interested in learning python and using the input outputs then read on.
Step 4.
I defer to Simon Monk's tutorial at the Adafruit Learning system.
In order to use the GPIO available on the Raspberry Pi, following this link Adafruit Learning system
This is how I setup and since it involves using Adafruit developed code I defer to them.
There is a lot of other things you can do and I will elaborate on these in other articles. I understand that you can use berryboot and use other os and etc etc but like I said this is just my way of setting things up. If you have any inputs please feel free to comment below.
No comments:
Post a Comment