You can compile your own static library in Eclipse. The best way is to create this as a library project, and to define a build configuration for each combination of AVR CPU and clock frequency you have.
Step 1: Library Build
- Open Eclipse and start a new C++ project.
- C++ Project
- Project Name: ArduinoCore
- Project Type: AVR Cross Target Static Libary
- Toolchains: AVR-GCC Toolchain
- Select Configurations, Uncheck debug.
- Set the MCU type and frequency for your Arduino board. For example, for UNO, useATmega328P running at 16000000 Hz. Click Finish.
Now we have the crux of our library. Now for the library files.
In eclipse,
- Right click on the ArduinoCore project in the project explorer on the right and select Import.
- On the Import dialog, select General => File System and click next.
- On the File system dialog click browse and select the Arduino IDE’s hardware folder “G:\Arduino-0023\hardware\arduino\cores\arduino”
- Select all the files except main.cpp. Click finish.
This basically gives you the staic library compiled in eclipse. You can fiddle around with build configurations and what not but the above is enough to give you a corelibrary. Build the ArduinoCore and in the release folder, you should get a libArduinoCore.a file. I am going to repeat steps from the last tutorial but with some changes.
Step 2: New Project in Eclipse
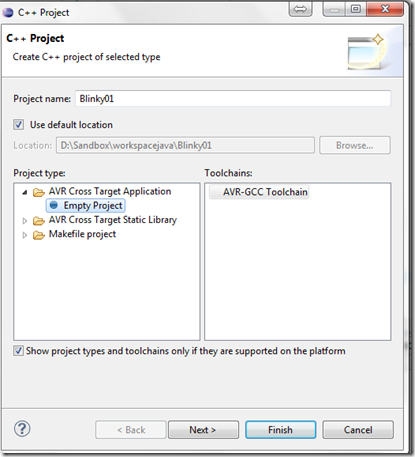
Start Eclipse and select File > New > C++ Project Fill in the blanks as
In the next page, Deselect Debug and Press next. For arduino UNO select atmega328p as the processor and frequency of 16000000Hz.( 16 000 000 no spaces) ![]() Click Finish.
Click Finish.
Now right click the Blinky01 project and select new source file. I usually use main.cpp as the file name. A new source file will pop up with a few lines of comment. Now for your program.
First we include the WProgram.h file because that adds all necessary headers automatically. Copy the code below.
/*
* main.cpp
*
* Created on: Jan 31, 2012
* Author: Inderpreets
*/
#include <Wprogram.h>
// This method is used for init of vars and stuff- run once
void setup(){
pinMode(13, OUTPUT);
}
//This run over and over again
void loop(){
digitalWrite(13, HIGH); // set the LED on
delay(500); // wait for a second
digitalWrite(13, LOW); // set the LED off
delay(100); // wait for a second
}
int main(){
// init must be called
init();
setup();
for(;;){
loop();
} //end for
}// end main
Save.
Step 3: Project Properties
At this point the IDE will point out that a lot of file and references are missing… So we help it find them. Next, right click the blinky01 project and select properties.
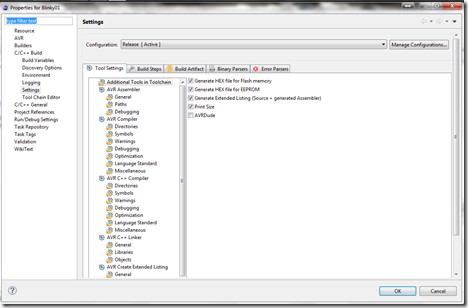
Go to C/C++ build > settings as shown
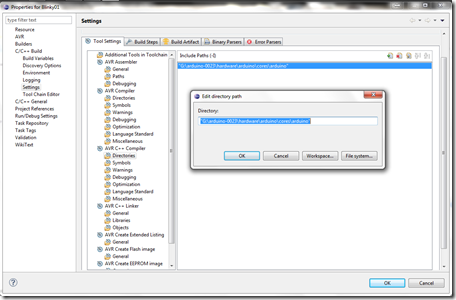
Go to AVR Compiler > Directories and click the add button. A pop up will ask for the directory paste this: "G:\arduino-0023\hardware\arduino\cores\arduino" with the quotes but replace path where applicable. Do the same with AVR C++ Compiler> Directories. 
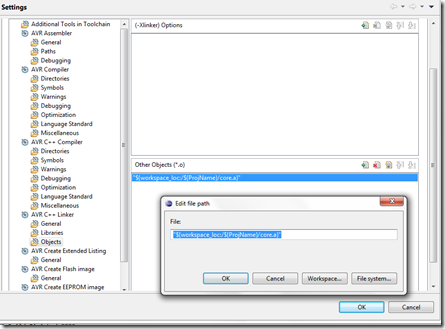
Now Select AVR C++ Linker and select Objects.Our Static Library compile gave us that object. Make the settings point to it. Using the Workspace, select the release folder for the ArduinoCore project and select the libArduinoCore.a file.
At this point you can pretty much click ok ok and build and will be ok. However there are a few extras you should do for other projects like compiler flag settings etc which I will discuss in a different article…
Right now the build should be ok by right clicking the project and build project and should be error free… How to upload the code to the UNO is a simple matter and is again covered in a separate article.
Cheers


No comments:
Post a Comment